|
Warmaster |
|
Warmaster Painting Guide | |
![]()
|
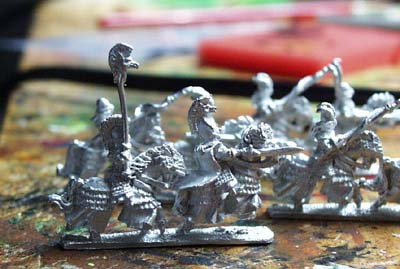
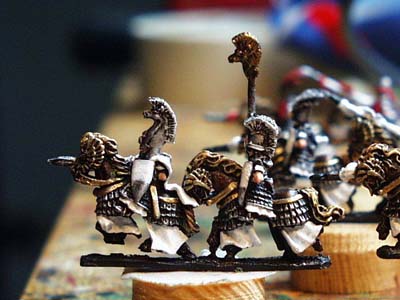
Preparations.It is a good idea to know what the models shall look like, before you start to paint. I often do a single base/stand to test the paint scheme. There are some things to remember when you start to decide on the paint scheme.Doug Adams shared his wisdom with us when he said that mankind is the only race in the universe to state the obvious all the time. So here it is: The models are small, they look small in your hands and look even smaller on the table. Besides being obvious it is also important for your choice of colours, patterns and highlighting. If you do a black and white check pattern on the trousers or your wardancers in Warhammer it will look quite nice, but doing the same on a Warmaster model will look blurred and a little bit like static snow on TV. So keep the paint scheme simple with flat areas of uniform colours. If you go for Golden Demon entry, it might be in order to do something more fancy, but on the gaming table simple schemes usually look better. On a Warhammer model for a gameing army, harsh highlight look often quite nice when the army is placed on the table and you are two arms length away. On Warmaster models strong highlights often seem to add another limb or object to the miniature, so it might be better to use a single not so strong highlight, which you probably don’t even realise when the model is on the table, but which makes a difference when you give the miniature a closer look. In the same direction goes the tip not to paint small details in too contrasting colours. On a distance it looks more than a misplaced spot of colour than a pouch or bottle. Also too much contrast in the different parts of the uniform might result in a noisy look. I’m sure you soon will get a feeling for what works for you. When you want to save time on painting it is always a good idea to paint more than one model at a time. The typical size of 3 stands per Warmaster unit gives you 6 miniature strips. Just the perfect number of miniatures to work on as once (good thinking Mr. Priestley). Like all miniatures the Warmaster models have to be cleaned and all flash has to be removed. The undercoat is rather important for how quickly you can finish the paint job. A sensible choice will save a lot of time later. On the silver helms I used a black base coat, as the black can be used for black-lining as well as it makes the silver of the armour stand out better. It is a good idea to mount the miniature on some kind of "handle", so you don’t have to touch already painted areas. I used a short piece of wood fastened double sided tape and stuck the miniature on top of it.
| 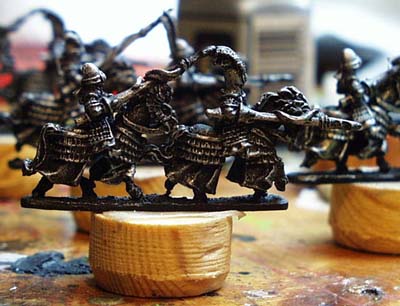
The model is now prepared for the "real" painting. Having said that, we do some "unreal" painting first, namely
a dry-brush. The silver dry-brush has three purposes (I’d wish everything I do would solve three problems
at once) First it paints the armour, second it shows all detail on the miniature making painting easier and
if combined with washes give you instant highlighting.
|
| 
I’d probably mentioned that the Warmaster miniatures are small, if I have not, now will be the time. With
models that small it is quite a good idea to paint from inside out. So next are the faces and as the brush
already holds flesh colour, the arms. You can paint the arms in a way, so that the black undercoat gives
an black outline which looks nice and does not disturb the looks on a distance (as the outline borders on
the armour).
|
| 
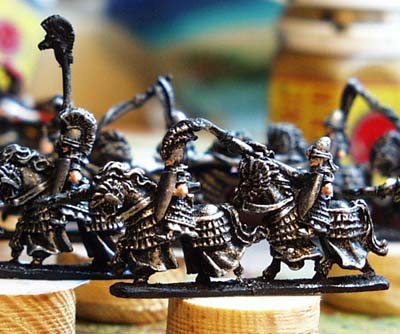
Horses are next. Now decide on the horses colour. You can save a lot of time, by using a dark breed of
horses. All you have to do is using a chestnut wash. On the black base-coat with silver dry-brush it will
appear to be dark brown, with highlights. The ink on silver will look like a satin brown a little bit as if the
horse has sweated. If you didn’t know it you would not think that this is silver. You might add a
second coat of the ink. Just to your liking.
| Painting the mane is as simple as it gets. You take a lighter colour and draw (?) the brush over the mane a little bit like a dry-brush. The undercoat and ink will work as shadows.
| 
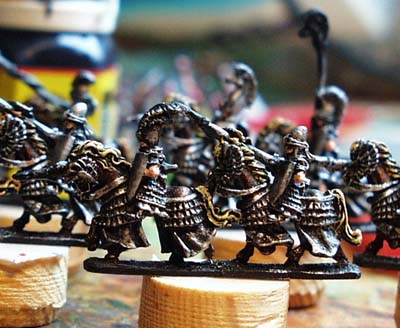
The painting of the golden accessories is as straight forward.
|
| 
Now the white of the barding and the
uniform are applied. I thought about doing light grey shadows for the barding, but it made no difference,
so I decided against it, to save time. Note that the areas to be painted red at a later stage are also covered with white,
so that the red will be brighter.
|
| 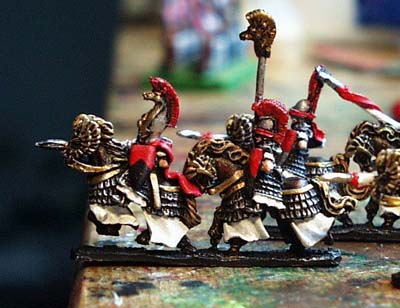
So some blue, some retouching and we are finished. Stop the press, there is no blue on my models.
Blue would have been the "politically correct" choice for High Elves, but I wanted to make a difference, so
I choose red. The red is so bright, that I decided to make the bottom part of the shield black instead of
white to give the model a "calmer" look.
|
| 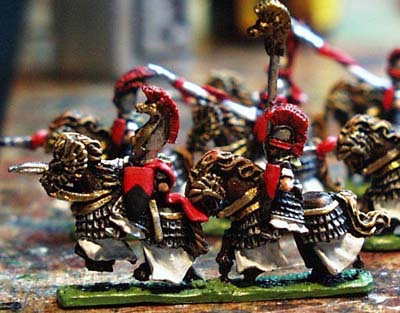
Last not least, some green is used to make the bottom of the strip look like gras. What color you choose depends
mainly of the way you will make the bases. I choose green on this as I thought about green bases. In the end I used black
for my army, as this (combined with the transparent bases) looks like a shadow.
| |