Sheets and Parts
The number of sheets per building varies. Each sheet consists of many parts. The parts are distributed randomly on the sheets. This is due to the algorithm to minimize the number of sheets per building.
The types of parts are usually the same for all buildings. The sheets always contain all parts including optional ones. The following sections will describe each type of part and give you some hints on preparing the parts. The sequence is the sequence in which you should prepare and assemble the parts.
Walls
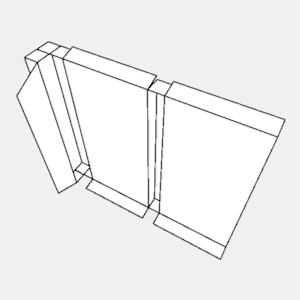
 Walls come in two flavours, with buttresses and without. In either case you cut out the part along it's outline.
Note that every wall has a flap at it's right side and further flaps at the top and bottom.
Directly following the right side flap there will be the corner buttress. This will always be a buttress no
matter whether you select columns or buttresses for wall support. A corner buttress has three (octagonal
buildings) or four (rectangular buildings) sides.
The sides are indicated by lines in the top and bottom flaps. Cut in the top and bottom flaps along those lines.
Walls with buttresses will have further marks in the top and bottom flaps for the sides of the buttresses. Cut
in the top and bottom flaps along those lines as well.
Walls with columns also have additional lines in the top and bottom flaps, but those are only needed for
reference.
Walls come in two flavours, with buttresses and without. In either case you cut out the part along it's outline.
Note that every wall has a flap at it's right side and further flaps at the top and bottom.
Directly following the right side flap there will be the corner buttress. This will always be a buttress no
matter whether you select columns or buttresses for wall support. A corner buttress has three (octagonal
buildings) or four (rectangular buildings) sides.
The sides are indicated by lines in the top and bottom flaps. Cut in the top and bottom flaps along those lines.
Walls with buttresses will have further marks in the top and bottom flaps for the sides of the buttresses. Cut
in the top and bottom flaps along those lines as well.
Walls with columns also have additional lines in the top and bottom flaps, but those are only needed for
reference.
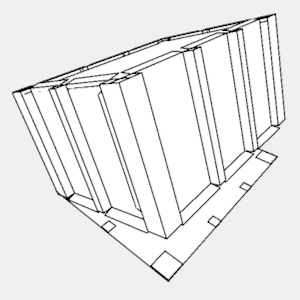
Each buttress has 3 sides and the corner buttress 3 or 4. The edges of those sides are marked by the lines (now cuts) in the flaps and the imaginary line where the flap at the left side meets the wall. So each buttress has 4 edges and the corner buttress 4 or 5 edges. The wall is folded to the outside along the two outer edges, and to the inside along the other edges. I usually start at the flap and move than along the wall. The cuts make the folding much easier giving the paper a hint where to fold. Once you tried it you will know what I mean.
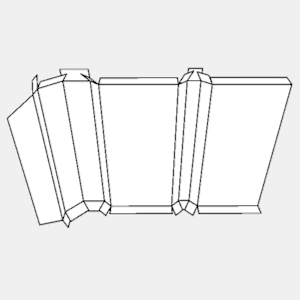
Once finished the flaps belonging to the buttresses and the corner buttress are folded inside and last the remaining bottom flaps are folded inside and the remaining top flaps are folded outside. All folds should be as sharp as possible. When folding outside I sharpen the fold by dragging my fingernails along the crease. To prevent rubbing off the color, I do not do this when folding inside.
Next step is glueing the flaps of buttresses into place. Bend the center flap of the buttress out of the way. Choose one of the side flaps to be the lower and put some glue on it's top. Hold the buttress so it's square and it's side flaps overlap lie on top of each other. Use a pincer to press them together. Put a little glue on the inside of the center flap and fold it onto the already assembled side flaps. Use the pincer to press them together shortly.
The corner buttresses are assembled in a similar way. Just alternate the position of the flaps. The first flap goes on top of it's neighbor flap. The second flap goes under it's neighbors and so on.
If you selected columns instead of buttresses, it might be a good idea to glue them to the walls now. The easiest way to build a column is to cut out the material for a column and roll it around something round which has the same diameter as the column shall have. I used a meat pick. Do a dry run first, try to wind the paper as tight as possible around the pick. The paper should be wide enough to overlap. When the paper rolls itself up like a scroll, wind it around the pick for a last time and glue the overlapping sections together and remove it from the pick. FGlue it against the wall between the marking on top and bottom flaps.
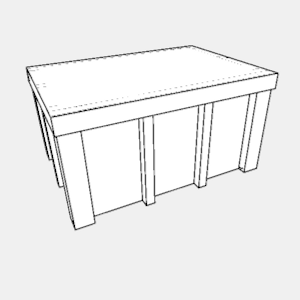
Floor
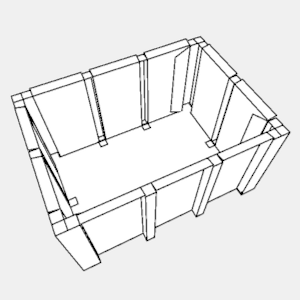
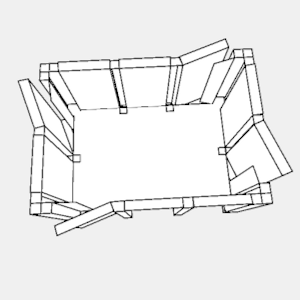
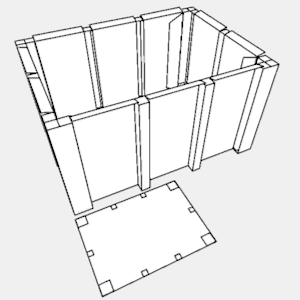
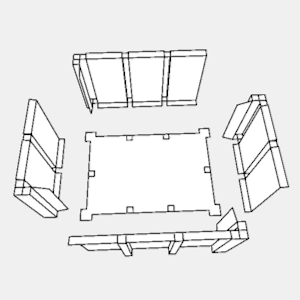 The walls are glued on one after the other. Starting with glueing a ear of the floor to the inside of the corner coulmn bottom. Then glue the flaps of each segment but the last to the underside of the floor. Make sure to align the buttresses with the markings on the floor. Glue the end of the wall to the flap of the next wall, before you will fasten the flap of the last segment to the floor.
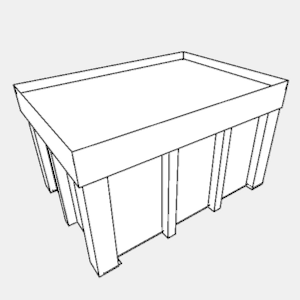
Ceiling

 The walls are glued on to the ceiling. It's best to glue flap for flap. It's important to align the flaps to be between the markings. This might need some "negotiation".
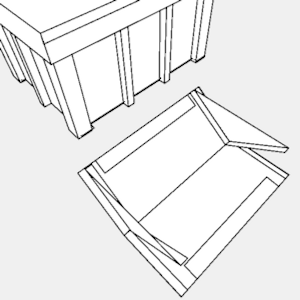
Flat roof
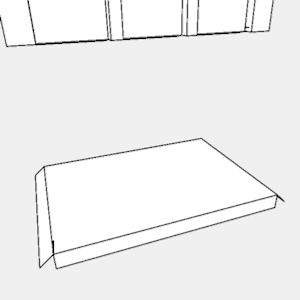
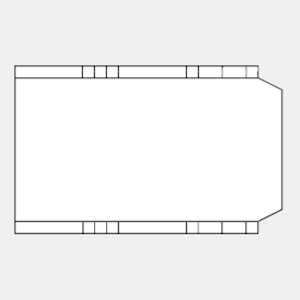
 Cut along the markings. This will create 4 side flaps. Fold them towards the unprinted side. Fold the corner flaps, which are the ends of 2 side flaps which shared an edge with one of the other flaps towards the unprinted side.
Glue the corner flaps onto the other side flaps, so that an open box is created.
Glue this onto the ceiling and the building is finished.
If you want you can add a parapet and/or a pitched roof.
Parapet
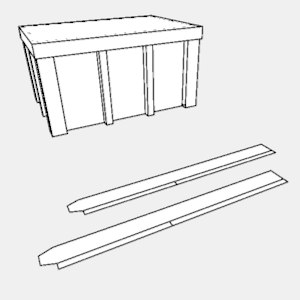 Cut along the single marking. Fold the side flap and the two flaps at the top towards the unprinted side. Assemble as shown.
If you want you can add a pitched roof.
Pitched roofs
There are two kinds of pitched roofs. The peaked roof is used when the buildings shape is square or octogonal, the gable roof is used when the shape is rectangulkar, but not square.
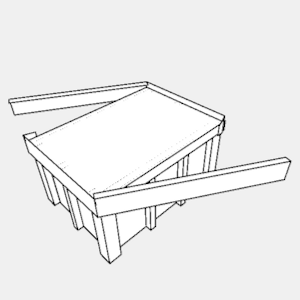
Gable roof
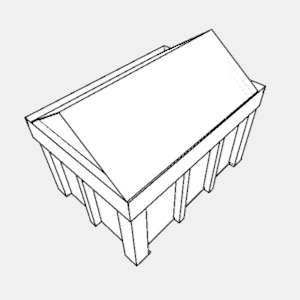
 Cut along the centre line, from the outside upto the flaps end. Fold all flaps to the unprinted side and glue the 4 overturned flaps on the small side into place. The flaps at the sides are to prevent the roof from bending inwards. Its enough to fold them, but you can use them also to glue the roof onto the building.
The gables have two flaps which have to be folded towards the unprinted side. These are used to glue the gable onto the inside of the roof. The printed side of the gable should be flush with the inner edge of the roofs overturned flaps.
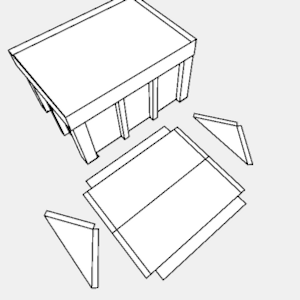
Peaked roof
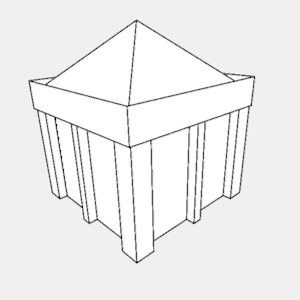
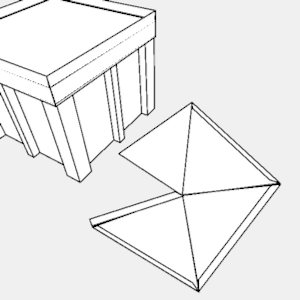
 Fold all flaps to the unprinted side. The flaps at the bottom of the triangles are to prevent the roof from bending inwards. Its enough to fold them, but you can use them also to glue the roof onto the building.
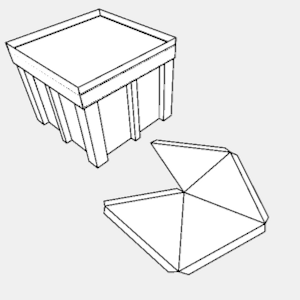
Fold all triangle at their connecting edges to the unprinted side. Finish the roof by joining the last and the first triangle by glueing the last triangle onto the "side" flap. On large buildings the roof will have more than one part. In such a case glue the parts together to form one bigger part and proceed as described.
Video
There is a very lengthy video 1.6 - 45 min. , which shows the assembly of the "default" building. I will shorten it sometime.
Please don't stream it - download it be right clicking. The video is in mp4 format. If you run into problems try using VLC player to watch it.
As I said it is lengthy, so you might want to jump forward over some boring scenes - no problem as you can always go back and watch something in depth when needed.