Brumbaer's Epic Buildings
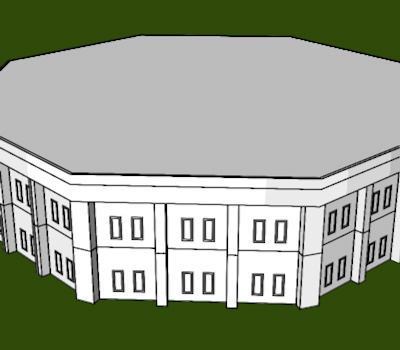
There had been problems when the corner width would be anything but twice the buttress width. Solved.
First things first.
I grant you free non commercial use of the models and software on this page.
Commercial use and/or distributiion of this site's models, software or any dervied products is prohibited.
Distribution of the software in any form is only permitted with written consent.
The use of the software is at your own risk, I assume no liability for any problems or damages resulting from use of the software.
The software uses Javascript, so you might have to enable it in your browser's settings.
Should the software fail to do what it is supposed to do, or if some parts are printing out wrongly, please mail me at brumbaer@brumbaer.de.
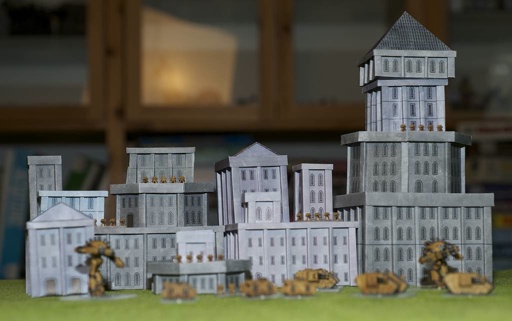
As you might know, I did some paper buildings for Warmaster.
Now the time has come that your Epic miniature get a roof over their heads. In contrast to my offer for the Warmaster buildings, the offer for Epic buildings is not just separate building sheets, but building generators, which allow you to create an endless number of variants and you can combine basic buildings to form more complicated ones. You start by deciding on the basic shape - ordinary rectangular or more exotic octagonal. The links at the bottom of this page will lead you to the respective pages.
You can set different parameters and when done you press the Create button and a number of images representing the building sheets will appear (in fact these are ordinary PNG images, but to discern them from other images I refer to them as sheets).
Paper
The sheets are designed for light papers. I used 80, 100 and 120g/m2 with good results. When you use paper heavier than 120g/m2 you might get severe problems, when trying to fold buttresses. Also the paper thickness assumed in the design, will be to small, what might result in bad fit.
Printing
The easiest way to print is using your browsers "print" menu item. There should be one page for each sheet and the size should be set for being printed at 100%.
Each sheet is designed to fit on A4 or letter paper with a margin of at least 1 cm on every side. If the minimum margins of your printer are wider, scale the print to fit the page size.
Instead of printing directly from your browser, you can copy the sheets to an image editor for printing and editing.
Copying to a document
To copy a sheet, you right click on it's image and select copy from the context menu. You then switch to your image editing or image viewing software and paste the image into a new document. On many editors the size for the new picture will be set automatically to the size of the image in the clipboard. I.e. Apple's Preview application will automatically create a new document with the sheet when you select New. Photoshop will offer you to create a document with the size set correctly and you just paste the sheet into the new document. If the size is not set automatically you must set it manually to 1900x2590 pixels.
The sheets have a resolution of 254 dpi, but this information is lost on copy and paste and the default resolution of 72 dpi will be set. If in doubt, check the setting within the software you use for printing. When the setting is 254dpi print the document at 100%, if it is 72dpi print it at 28%.
You can save the new document for later reference and editing or just print it.
Changing the colors
All buildings use the same patterns. If you want slight differences in color you can change the color settings in the print dialog of your printer. Or you can manipulate the image to your hearts content, when loaded into an image editor.
Parameters
Once on the page for the respective shape, you can select some parameters for your building. When you click into an editbox or on a radio button, the image to the right of the input field will show you what the parameter represents.
If there is any input error, there will be a message directly under these boxes.
This message usually occurs when you choose an illegal option, but might also appear after pressing the Create button, if one of the parts will not fit on a sheet.
Pattern loading
Directly beneath this image are 8 colored boxes. When green, all images and patterns have been loaded. While at least one box is red, the sheets will still be created, but some colors will be missing. The size of the patterns differs immensely, especially the two before the last are very large.
Sheet creation
The time needed to create the sheets depends on the complexity/size of the building and the speed of your computer browser combination. On my Mac the default rectangular building is done in 2.5 seconds using Safari, but takes only just over a second in Chrome. The iPad3 needs about 10 seconds
Don't get nervous if it takes a bit of time. It's only Javascript after all and for some buildings many pages have to be computed. While the Create button is not released the program is still working.
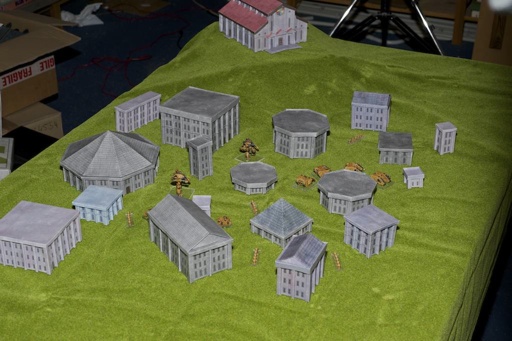
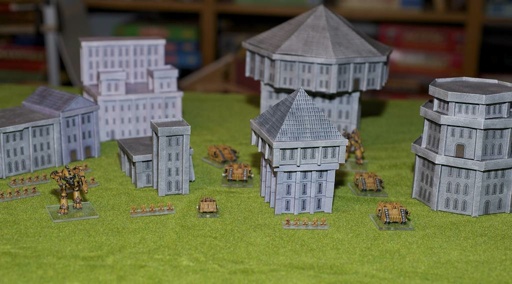
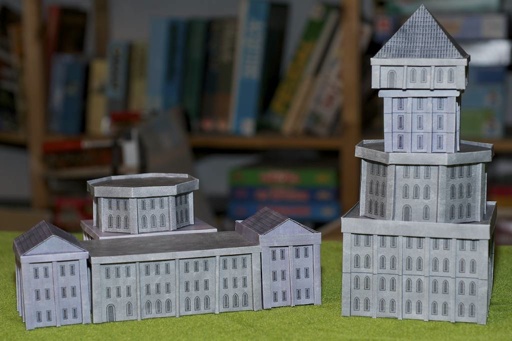
You can combine the buildings in different ways to create different buildings. Just have a look at the pictures.
Parts
There will be many parts on the sheets. Walls, floor, ceiling and flat roof will always be used. The pitched roof and the battlements will always be printed, but their use is optional. Columns are only printed, when the option is selected, but than their use is optional - you can have a "clear" wall only with corner buttresses this way..
Some last words about doors. One of the settings is the kind of doors to be used. The position and number of doors used is random - except when you choose no door. The probability that a segment will have a door is 25%. But this is a probability - in theory it can happen that no segment has a door or all segments have a door. If you do not like the result, press the Create button again or use an image editor to copy and paste doors and windows wherever appropriate.
Make sure you check out the tips for putting it all together, before starting the assembly.
And now - off you go: