![]() efore we start a tip to consider. The wall section will have a tendency to topple.
efore we start a tip to consider. The wall section will have a tendency to topple.
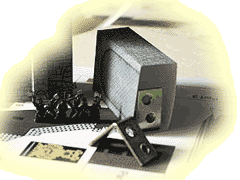
 This can be overcome, by mounting it on a base or by using a weight. I use L-profiles and glue them to the inside as far to the bottom as possible. The picture shows an example. I mention this at the start of the document, so you can plan for it and get the parts before you start.
Part 1 (the wall)
This is the main part of the wall on theses stones rests the world (so to
say).
Standard procedure.
Part 2 (parapet)
A variation of the standard box procedure. Please not that there is no fold
between the striped areas and the white area with "Part 2" on it.
The white area only indicates where the wall has to be glued on. You can cut
out the windows, if you want (I don't do it as I'm content with the
"black windows". Glue the parapet on top of the wall, the wooden
side of the parapet showing inwards (where the arc is).
Part 3 (parapet inlay)
Part 3 is only needed, if you want to make the roof removable (for placing
miniatures in the parapet) and/or if you want to have cut out windows. The
inlay is standard box procedure and cut the windows out, if you did so on Part
2.
If the roof shall be removable, be careful when you build the inlay and make
sure that it will fit comfortably in the parapet. Depending on paper thickness
there might be some trimming in order.
Part 4 (parapet roof)
Standard roof procedure, but only two sides have
to be folded. If the roof is to be removable or the windows are cut out the
roof is glued to the flaps of the inlay. Otherwise it is glued directly onto
the parapet.
Part 5 (buttress)
Standard buttress procedure.
The buttress is optional, but It is almost
unbelievable what difference the buttress makes. At least every second segment
should have one.
 You have now finished the basic city wall. You can add stairs to improve the looks and increase the feel of reality (as far as paper buildings go).
Part 6 (stair's wall)
A more complex box. There is a small orange line. This indicates a cut. I used orange to make it stand out. Please note that the part of the wall under the cut is folded inwards as well as the slope below it. Do not glue Part 6 to the wall yet.
Parts 7 (stair*s floor)
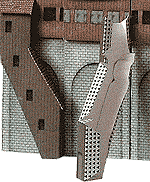
This has to be folded as indicated. Please note that there is a red folding line indicating a fold towards the printed side. The flap of Part 7 is glued to Part 6 just above the flap mentioned in the last paragraph. When glued to Part 6 it will look like the picture to the right.
When dry glue them to the wall section (back side (the one with the arc).
Parts 8-9 (stair's roofs)
Standard roof procedure.
And that's it.